How to Build a Solar Panel at Home?

Renewable energy is one of the best ways to add value to your home. Not only is this type of energy sustainable, but it also comes with a load of benefits. A solar system can help you save on your monthly bills, as well as help protect the environment.
Many people shy away from investing in solar energy because of the upfront cost. You may be able to reduce that cost by opting to make your own solar panels from home. This will allow you to save money on your utility bills, help the environment, and engage in the construction of sustainable energy. It doesn’t take a rocket scientist to construct a solar panel! Follow Harness‘s easy steps below and reap the benefits of renewable energy.

Your Shopping List
To make it easy, always gather all of your materials before beginning your project. Here is a list of materials you will need to make your solar panel.
- 11 feet of 1.5-inch aluminum angle iron at .125 inches thick.
- 16 nuts and bolts (14 for corner and L brackets
- and two for the terminal block.
- Clear Silicone Caulking
- 1/8 – 1/4-inch Tempered Glass
- 36+ Solar Cells
- 36+ feet Tabbing Wire
- 3 feet Bus Wire
- Solder
- Flux
- Two Terminal Terminal Block
- 16 or 14 AWG Wire (Two Colors)
- 16-14 AWG #8 Stud Feet
- 1 Diode
- Heat Shrink
- Encapsulant
DIY Solar Panel Specifications

Until it is time to use your materials it is best to keep them in their packaging. Things such as the cells are very fragile and need to be kept safe! The dimensions of your panels will depend on the size of your cells and how many you plan to use in your panel.
Frame Work
You will need to construct a frame for your cells to fit in. Ideal material includes a thin board that is made of non-conductive materials. Begin by laying your cells out and measuring the dimensions. Use these dimensions to cut the board.
Allow an extra 1 to 2 inches on the ends of the board. You can use this area for wires that will connect rows. Wood is the best backing material, as it is the easiest to drill through. You will want to use aluminum angle iron for the frame. Miter cut the edges, which will allow the frame pieces to have a shorter and longer side to come together at a 45-degree angle.
-
Glass
It is best to use ¼ inch thick tempered glass, as regular glass runs the chance of breaking if it gets hit. In addition, sudden temperature changes could also cause the regular glass to shatter. You will find that commercial panels use thinner glass, but ¼ inch will withstand 100 mph winds. Making it a durable choice.
-
Electronics
Depending on the cells you buy, they should be rated at around 4 amps and 0.5 volts. Connecting them in a series will give you an output of 18 volts and just under 4 amps. Of course, this will all depend on the cells you buy. Ensure that the diodes are rated at high enough amps and volts to support the entire panel.
Choosing Your Own Panel Specifications
-
Frame
The finished panel needs to have some space at the edge of the frame. This is because the frame is raised on the edges and this will create a shadow. Moving the cells into the frame and leaving the edges with open glass will help deter this problem. In addition, you want to make sure that the panel sits on an angle iron edge to help it stay put. Make sure there is space between the edge and glass of the frame to allow the corner brackets and screws to be placed.
-
Cells
You have to choose rather connect your panels in parallel or series. This will affect the voltage outcome. Some cells may have a lower voltage, and these you will want to connect in a series: positive to negative to positive to negative. When connected in a series, you can easily add up the voltage. For panels that are more than 20 volts, you will need an MPPT charge controller.

The market is flooded with different types of solar cells that you can buy. Top options are constructed in the US, Japan, or China. While there used to be a large difference in the efficiency of monocrystalline and polycrystalline cells, the solar industry has come a long way. You will find that polycrystalline cells are the most cost-effective option that the market has to offer.
The number of cells will depend on the amount of energy you are looking to produce. Here are some things to keep in mind when purchasing solar cells:
-
- Buy extra cells as they are fragile and can easily break during construction.
- Online vendors are ideal for sourcing cells.
- The cells may be shipped in wax, which will need to be cleaned off. To clean the wax off you will need to dip each of them in hot water. Make sure the water is not boiling.
- The cost of each cell should not exceed $1.30 per watt.
-
Electronics
You will need to ensure that the voltage and amps coincide with the diodes and wiring gauge that you choose. It’s best to invest in a diode that has a higher rating voltage and amps than your panels output. If you are concerned about what type of cable you should be using, check out the chart below:
Putting Your Solar Panel Together
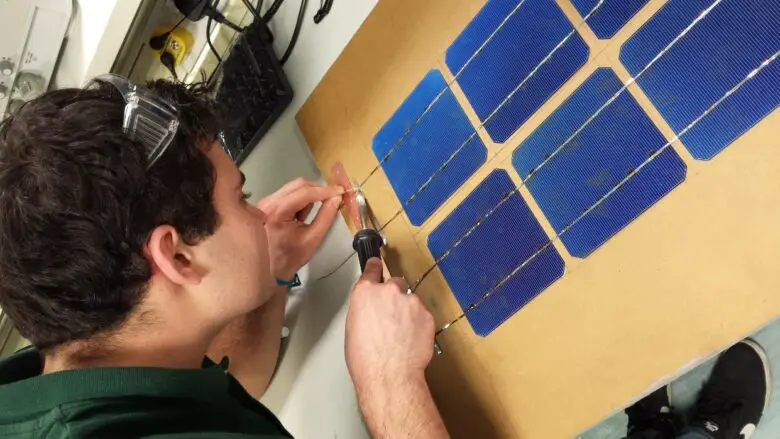
Follow the easy step by step instructions with a guide at hand. Putting a solar panel together is not difficult when you have the right tools and materials.
What’s The Cost Difference?
Solar panel costs have decreased massively in the last decade. When solar power first came about, panels cost around $5 per watt. However, nowadays you can find loads of panel options for about $1 watt.
To be honest, with the market prices being so low, it is cheaper to buy your panels premade. However, if you are looking for a project to do, then building your own solar panels is a great one. While it will not save you money to make your own panels, it will help you understand solar power and how panels are constructed. It does take time to construct a DIY panel, but it is a project that will teach you all about renewable energy!
